 Svenesis.org
30 July 2026 · 🔭 Astronomy
Flats, Darks, Bias – Calibration, and Why I Really Want a Motorised Flat Panel
A raw frame off the sensor never shows just the sky. It shows the sky plus everything the camera and the optics add themselves: an electronic pedestal, a little thermal signal, dust shadows and dark corners.
Calibration means measuring those ingredients and taking them back out, so that only the real signal is left. Right now I have none of them: no flats, no darks, no bias. My SH2-129 image was put together exactly like that, and so far dithering is my only defence against hot pixels. Here is what the three (really four) frames are, which of them actually matters on my camera, how I will take them – and which flat panel I am buying for the job.
What is in a raw frame
Every light frame is a sum of:
- the real signal – nebula, galaxy, stars,
- an electronic pedestal of offset and read noise – identical in every frame,
- a thermal signal of dark current and hot pixels – depends on exposure time and temperature,
- and optical unevenness – the corners are darker than the centre (vignetting), and every speck of dust on a filter or the sensor casts a shadow.
There is one calibration frame for each of those ingredients. The arithmetic behind it is remarkably simple:
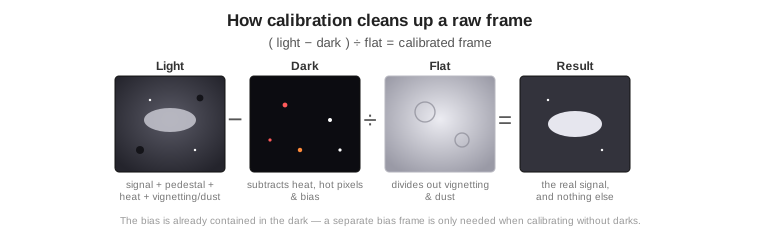
Calibrated frame = (light − dark) ÷ flat. The dark is subtracted, because it is additive: pedestal and heat sit on top. The flat is divided out, because it is multiplicative: it dims the light by a different amount across the frame.
The four frames one by one
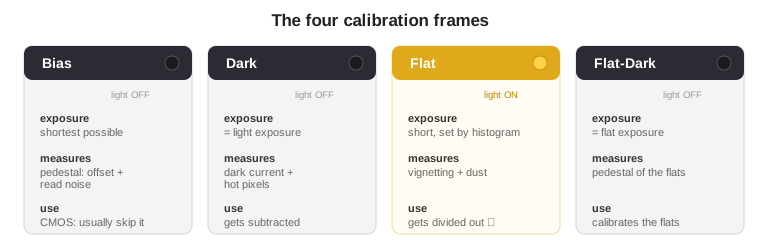
Bias – the shortest possible exposure in the dark, a fraction of a second. It measures the bare electronic pedestal: offset plus the fixed read-noise pattern, with no light and effectively no exposure time. Same gain and offset as the lights.
Dark – the same exposure time, gain, offset and temperature as the lights, but in the dark. It captures what accumulates over time: dark current, hot pixels, possibly amp glow – and it already contains the bias. It gets subtracted from the lights.
Flat – an evenly illuminated field, shot through the whole optical train at identical focus, filter and rotation angle to the lights. It records vignetting and dust shadows, and the lights are then divided by it. The most important frame – more on that shortly.
Flat-dark – a dark matched to the flat exposure time. It calibrates the flats themselves, because they have a pedestal too. On modern CMOS cameras flat-darks are preferred over bias frames for this.
The cardinal rule: darks and bias have to match the gain, offset and temperature of the lights; flats have to match focus, filter and rotation. And flats need their own flat-darks at the same exposure time.
Which of them matters on my camera
That comes down to my sensor, the Sony IMX533:
- Flats are priority one. Vignetting and dust are always there – pure optics. Without flats you are left with dark corners and dust “donuts”, and stretching only makes them uglier.
- Darks are almost secondary. The IMX533 has extremely low dark current (only about 0.06 e⁻ in 300 s at −10 °C) and no amp glow; hot pixels are handled by dithering anyway. A dark does no harm, but it gains me very little.
- Bias is awkward on CMOS. Very short exposures are often unstable, and darks cannot be scaled using the bias. So the modern approach skips the bias entirely and uses flat-darks for the flats and exactly matched darks for the lights. My IMX533 would be forgiving here – no amp glow, and a dark looks much like a bias – but I am sticking with the standard flat-dark route.
In short, my order of priority is flats ≫ darks > bias. Which is why my purchase comes down to exactly one thing: a flat panel, the piece that makes the biggest difference for me.
The remote catch: it has to be an automated panel
My rig sits 8,500 km away in Texas – nobody can walk over and put a cap on it. Darks, flat-darks and bias need darkness; flats need an evenly lit surface in front of the optics. Both have to happen fully automatically.
So the only option is a motorised panel that N.I.N.A. can open, close and dim, and that doubles as a lid: closed with the light on gives flats, closed with the light off gives darks and bias, open means observing. A hand-held panel is out of the question for remote work.
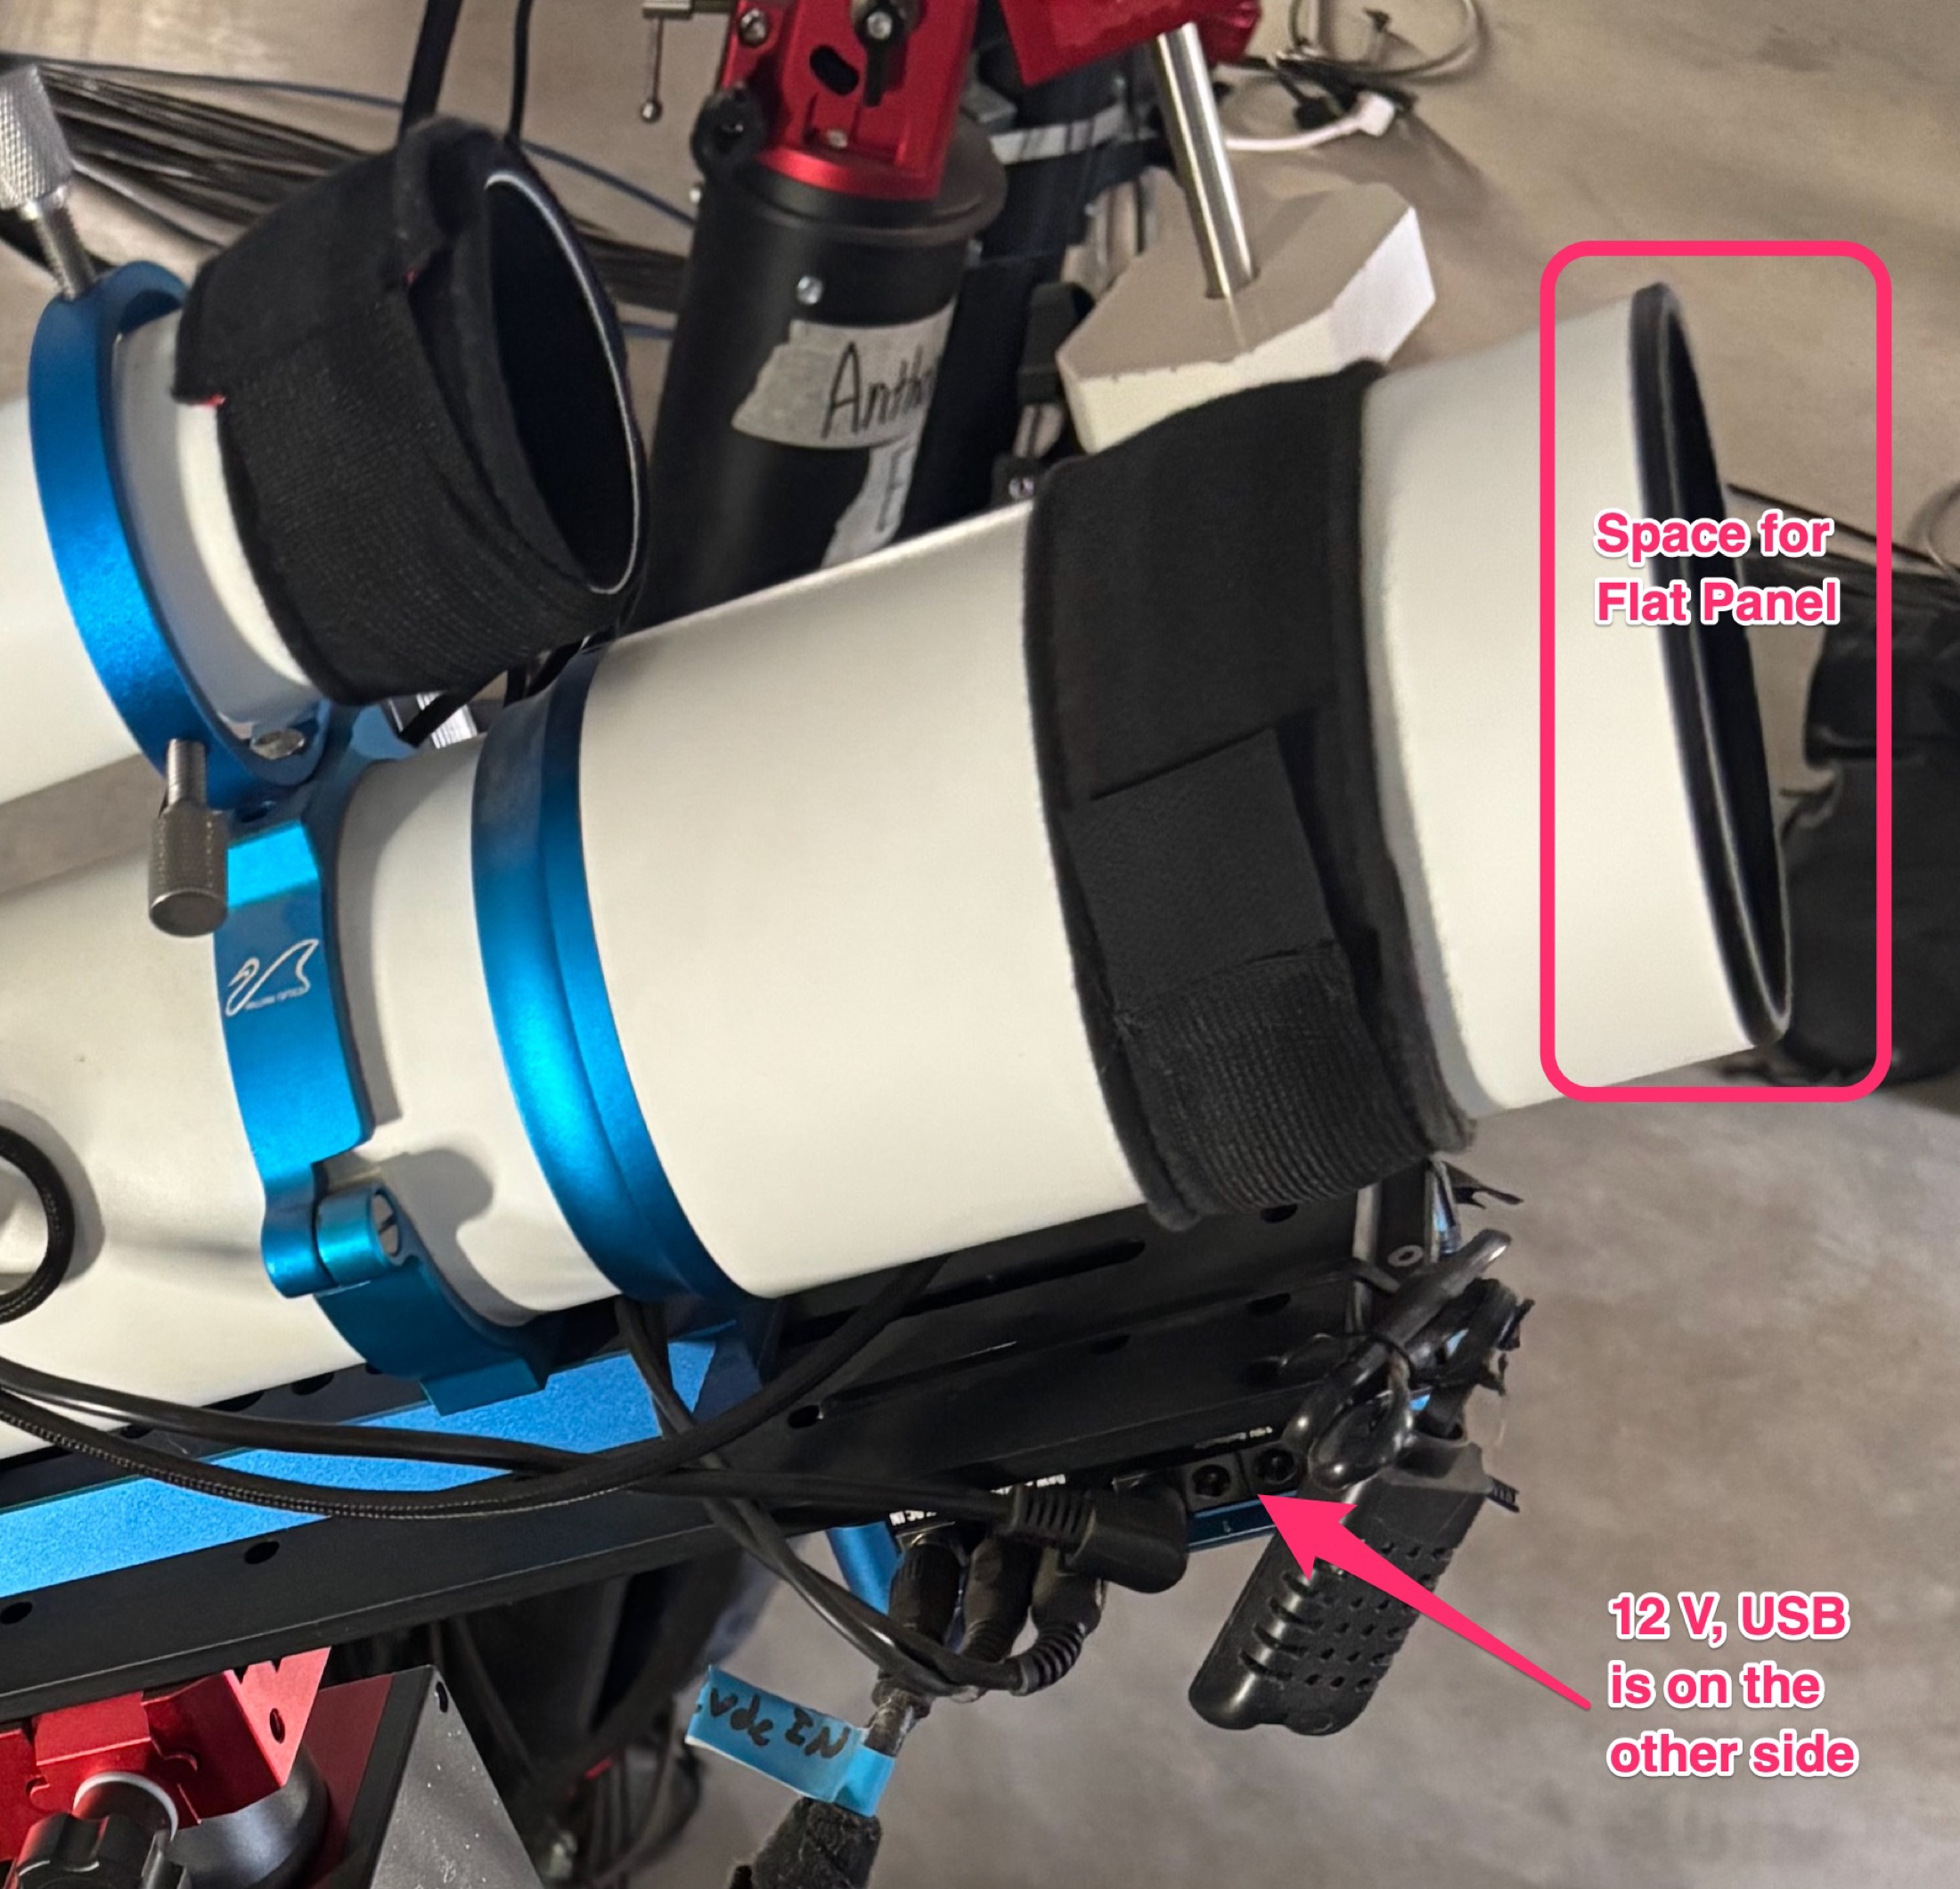
Almost as important: I have no control over the roof – Starfront manages that – and my GT81 currently has no remotely operated cover. With the roof open, the exposed front lens radiates its heat away to the cold sky and fogs up with dew, and on cold Texas winter nights sometimes with frost – over months, that is bad for the coatings and for keeping the glass clean.
A closed panel defuses that twice over: it is a dust cap and protective lid, and it damps the radiative loss – and therefore the dew and frost risk – even with no power applied. Against trapped residual moisture there is a heater behind the illuminated surface, which is best left running permanently – ideally regulated to the dew point by a sensor. Whether a panel offers that genuine automation, or simply leaves you to set the heater to “always on”, is a clear difference between the two candidates.
The panel question: FlatMaster Neo 120 or Deep Sky Dad OFP2?
Both are motorised, remotely controllable, have a dew heater and can serve as a lid – so both are remote-capable in principle. The differences:
| Pegasus FlatMaster Neo 120 | Deep Sky Dad OFP2 (GT81) | |
|---|---|---|
| Design / space | hinged lid at the front, swings upwards | opens sideways – adds no length |
| Fit on the GT81 | flange needs a dew shield ≥ 125 mm across → does not fit (GT81 = 103 mm) | made to measure – guaranteed fit |
| Control | Wi-Fi/web + ASCOM, auto-close at sunrise | ASCOM/INDI/ASIAIR, obstruction detection |
| Narrowband | 2–3 s at 3 nm, brightness per filter | 12-bit dimming (0–4096) |
| Dew heater | Auto-Dew (dew-point sensor, 1–10) | heater, on/off only – no dew-point automation |
| Power | a single USB-C (5 V) | USB-C + 12 V / 3 A from the power box |
| Price | ~419 € + VAT (around 500 €) | 363 € |
On the DSD heater: standard equipment according to the product page, listed as “optional” in the manual – worth checking at checkout.
My choice: the Deep Sky Dad OFP2 PRO
It is made to measure for the GT81 dew shield, opens sideways (no extra length, no clearance needed), can be driven via ASCOM, INDI and ASIAIR, comes with a dew heater and obstruction detection, and its 12-bit dimming (0–4096) gives the fine control needed for clean narrowband flats. Handily, it runs on 12 V – exactly what my power box already supplies – plus the USB-C cable in the box. The one compromise: I have to leave its heater on permanently, because it has no dew-point automation; the thermistor only protects against overheating.
The FlatMaster Neo 120 would be the smarter device: real Auto-Dew with a dew-point sensor, auto-close at sunrise, a bright LED panel, a single USB-C cable and the same Pegasus ecosystem as my power box. Two things rule it out. It is still young – there are reports on Cloudy Nights of a problem with the closing mechanism – and, the actual deal-breaker, its silicone flange needs a dew shield of at least 125 mm external diameter (and up to 166 mm internal). The 120 in the product name refers to the telescope's aperture, not to the dew shield – at 81 mm of aperture the GT81 would be well inside that. Its dew shield, though, measures only 103 mm across – and that holds for generation III as well as IV: when William Optics changed generations, only the rear end with the focuser and rotator was reworked, the front CNC housing kept its dimensions. Without an improvised adapter it simply will not seal on my refractor, and improvising on a rig 8,500 km away is not something I want to do.
So the decision is made: fit beats convenience. One tip from the forums applies to both: run the panel from a clean 12 V source – in my case a plain 12 V output on the PPBA – and not from a PWM-dimmed dew channel, or you can end up with banding in your flats.
How I will take the frames
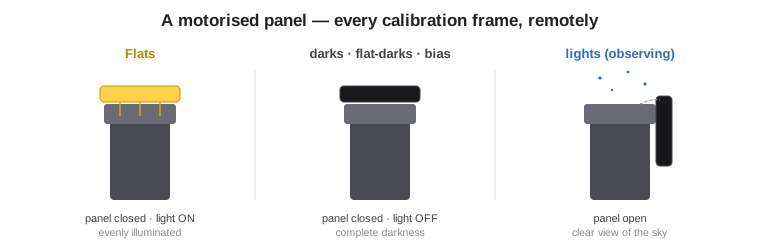
Flats. The closed panel sits on the front of the dew shield and lights the optics evenly. For each filter I set brightness and exposure so that the histogram lands at roughly a third to a half of the range – not too dark, not blown out. Focus, filter and rotation exactly as for the lights, otherwise the dust shadows no longer line up. N.I.N.A. has a flat wizard that dials in the exposure per filter automatically. 20 to 30 flats per filter, stacked.
Flat-darks. Straight afterwards: panel off, same flat exposure time, same settings. As many as there are flats.
Darks. Panel closed and off. Same exposure time, gain, offset and temperature as the lights. Because my cooling is held at a fixed −10 °C, I will build a dark library once – say 30 to 50 darks per exposure time – and reuse it for weeks.
Bias, if at all: shortest exposure, dark, same gain and offset. Probably not, for the reasons above.
And now?
Now I just have to decide and order – and then wait until the panel arrives at Starfront and gets fitted. Once it is on the rig and the first automatic flats are running, there will be a post of its own: commissioning the new automated flat panel.
Update: decision made – I have just ordered the flat panel (OFP2 PRO) straight from Deep Sky Dad. Let us see when and how things go from here – stay tuned!
And right on its heels, the reality check from the order confirmation: “We are currently experiencing increased amount of orders, so we will prepare and ship the package in 4-5 weeks.” Hmmm. So the first automatic flats are going to take rather longer than I hoped.
🔭 The rig behind it: My rig @ Starfront in Texas · Why darks barely matter on this camera: From photon to number → · What handles the hot pixels so far: Dithering →