 Svenesis.org
July 25, 2026 · 🔭 Astronomy 🖥️ Technology
Seven Filters, One Button – How I Learned Mono Image Processing by Writing My Own Siril Script
👋 Right up front: I'm no image-processing expert (not yet 😉). I came from a Seestar, where you press one button and get a finished picture. What follows isn't a tutorial from someone who has mastered this – it's a report from someone still teaching himself. By a somewhat unusual route.
Why a Colour Camera Is Easy – and a Mono Camera Isn't
An ordinary astro camera, a so-called OSC (one shot colour), makes life simple. Over its sensor sits a tiny pattern of colour filters, the Bayer matrix: every pixel is permanently assigned to see red, green or blue. One exposure, all colours captured, done. That's exactly how the Seestar works – and exactly why it's such a wonderful entry-level device.
The price you pay: each pixel only ever sees a third of the colour information, and software has to interpolate the rest. A monochrome camera has no such pattern. It simply sees brightness – but with every single pixel, at full resolution. The colour comes from outside instead: from a filter wheel that rotates different filters in front of the sensor, one after another.
Optically, that's the cleaner solution. But it also means you no longer bring home one dataset – you bring home several. One per filter. And in the end they have to line up pixel for pixel, or the finished image gets colour fringes.
Seven Filters, and the Arithmetic Turns Unpleasant
My rig in Texas carries a Player One Ares-M Pro – an IMX533 in mono – behind a ZWO filter wheel with eight slots. Seven are occupied: the narrowband trio SII, Ha and OIII from Antlia at 4.5 nm bandwidth, plus luminance, red, green and blue.
Seven filters mean an awful lot of separate piles of raw frames from one single night. Each one wants calibrating – with the matching darks, flats and bias. Each one wants registering and stacking. After that, the finished masters have to be aligned with one another, because hours pass between the Ha stack and the OIII stack, and in that time the field has shifted slightly. Only then can you combine three of them into a colour image. And then you should colour-calibrate the result, so the colours aren't guessed but measured.
I didn't learn this through painful experience. I learned it by reading. I sat in front of one of those thorough how-to guides on doing this in Siril, worked through the steps – and at some point it dawned on me how many menus, dialogues and clicks that adds up to per night. Multiplied by seven channels. Every single one of them offering a chance to forget or mix up something.
At this point I should say something about myself: I'm impatient. I want things at the press of a button, and whenever something runs the same way more than twice, I can't help thinking about how to automate it. Professionally that's a useful trait. As a hobbyist it's occasionally an exhausting one.
The Unusual Detour: Program First, Understand Second
The normal path would have been: browse through the guide, click your way through a few nights, build up a routine, and eventually you understand it. I took a different one – not out of showing off, but because that's simply how I learn.
When I program something, I have to have understood it completely. Clicking lets you follow a menu item without knowing why. Programming doesn't: you have to decide when which rejection algorithm is the right one, which calibration file matches which frame, what should happen when something is missing. Every one of those decisions forces you to get to the bottom of the subject.
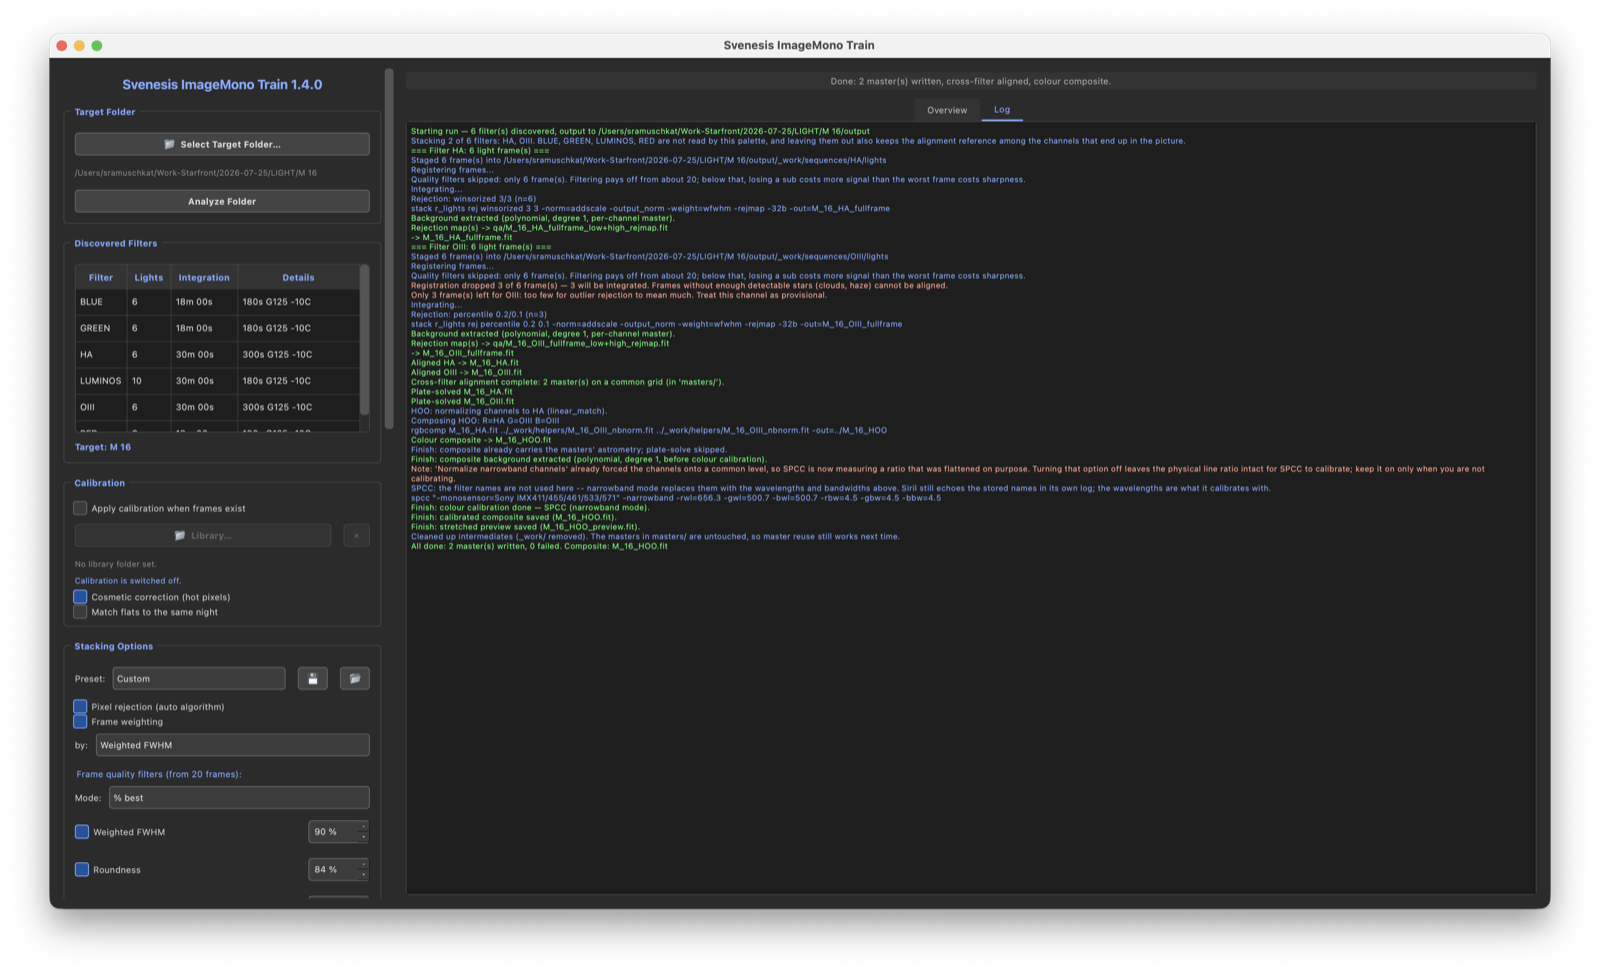
So I built my own tool: Svenesis ImageMono Train. A Python script for Siril that takes a full night of mono data from raw frame to colour-calibrated image. And logs every step along the way – not least so I can read up afterwards on what it did.
Three Things I Genuinely Learned
Out of everything the script does today, I'll pick three points – because those are the three places where I understood the most.
1. There is no single correct stacking algorithm. When stacking, you have to reject outliers – satellite trails, cosmic rays, an aeroplane. There are various methods for this, and I assumed at first that you pick one and stick with it. Wrong. The methods need different numbers of frames to work sensibly at all: with four frames a sigma method is statistically blind; with fifty, a simple method is a waste. My script therefore decides this per filter – percentile clipping up to four frames, Winsorized sigma up to twenty, linear fit to just under fifty, and GESDT above that. And – this is the part that cost me the most thinking – it counts the frames that are actually usable, not the ones that were taken. A channel that lost half its frames to clouds is a small stack, even if forty images were captured originally.
How practical that is showed up immediately on the night I shot M 16, the Eagle Nebula: Ha delivered six usable frames and got Winsorized sigma. On OIII, registration failed on three of six frames – too few detectable stars, clouds or haze. Three were left. The script switched that one channel to percentile clipping and noted in the report that three frames are really too few for outlier rejection to mean much, so the channel should be treated as provisional. That's exactly the kind of warning I would never have given myself while clicking.
2. Colour fringes don't originate in the colour, but in the alignment. This was my first real test of patience while building. Every channel is stacked on its own – and each one lands on a marginally different pixel grid, because the field rotated and drifted between the sets of exposures. Combine the three masters naively and you get coloured edges around every star. The fix is to register all masters together once more and project them onto their common overlap – in Siril, that's -framing=min. Sounds like a one-liner, but it kept me busy for a long time: because this crops the frame, masters produced later no longer match earlier ones. My script now detects that and refuses to mix them, rather than producing a broken image.
3. Colour calibration is physics, not a matter of taste. Siril's spectrophotometric colour calibration compares the stars in the image with a catalogue and computes the true colours. For that to work, it needs to know how sensitive the sensor is at which wavelength, and what the filters let through. And here lurks a trap that cost me a good hour: my IMX533 appears in Siril's sensor list only in its colour version. The mono variant is listed under a completely different name, grouped together with related sensors. Enter the wrong one and everything runs through – the colours are simply wrong. That's why my script now checks the name before the run and says so, rather than quietly letting one sit there being wrong. For narrowband it works with the real emission lines: Ha at 656.3 nm, OIII at 500.7 nm, SII at 671.6 nm.
⚠️ And one gap I don't want to hide: the script handles calibration in full – flats per filter and session, darks and bias from a reusable library, all matched cleanly via the FITS headers. Except that I use none of it so far.
I simply haven't taken a single calibration frame yet – and for none of the three kinds do I really know how to manage it from 8,500 kilometres away. Flats would need a remotely operated flat-field mask such as the Pegasus FlatMaster 120 Neo, and I don't have one (yet) – holding a white surface in front of the objective isn't an option in Texas. And how to get usable darks when I can't just put the cap on the camera is something I haven't worked out either. Those are exactly the next pieces of homework – until then my images run uncalibrated.
What Comes Out at the End
You point the script at a folder – in my case the data lands there by itself, because the rig PC in Texas pushes it home via Dropbox. The script reads every FITS header, groups the frames by filter, shows a report of what it found, and then gets going. At the end you have the aligned masters per channel plus the finished colour composite – as LRGB, SHO, HOO or HaRGB, whichever you like.
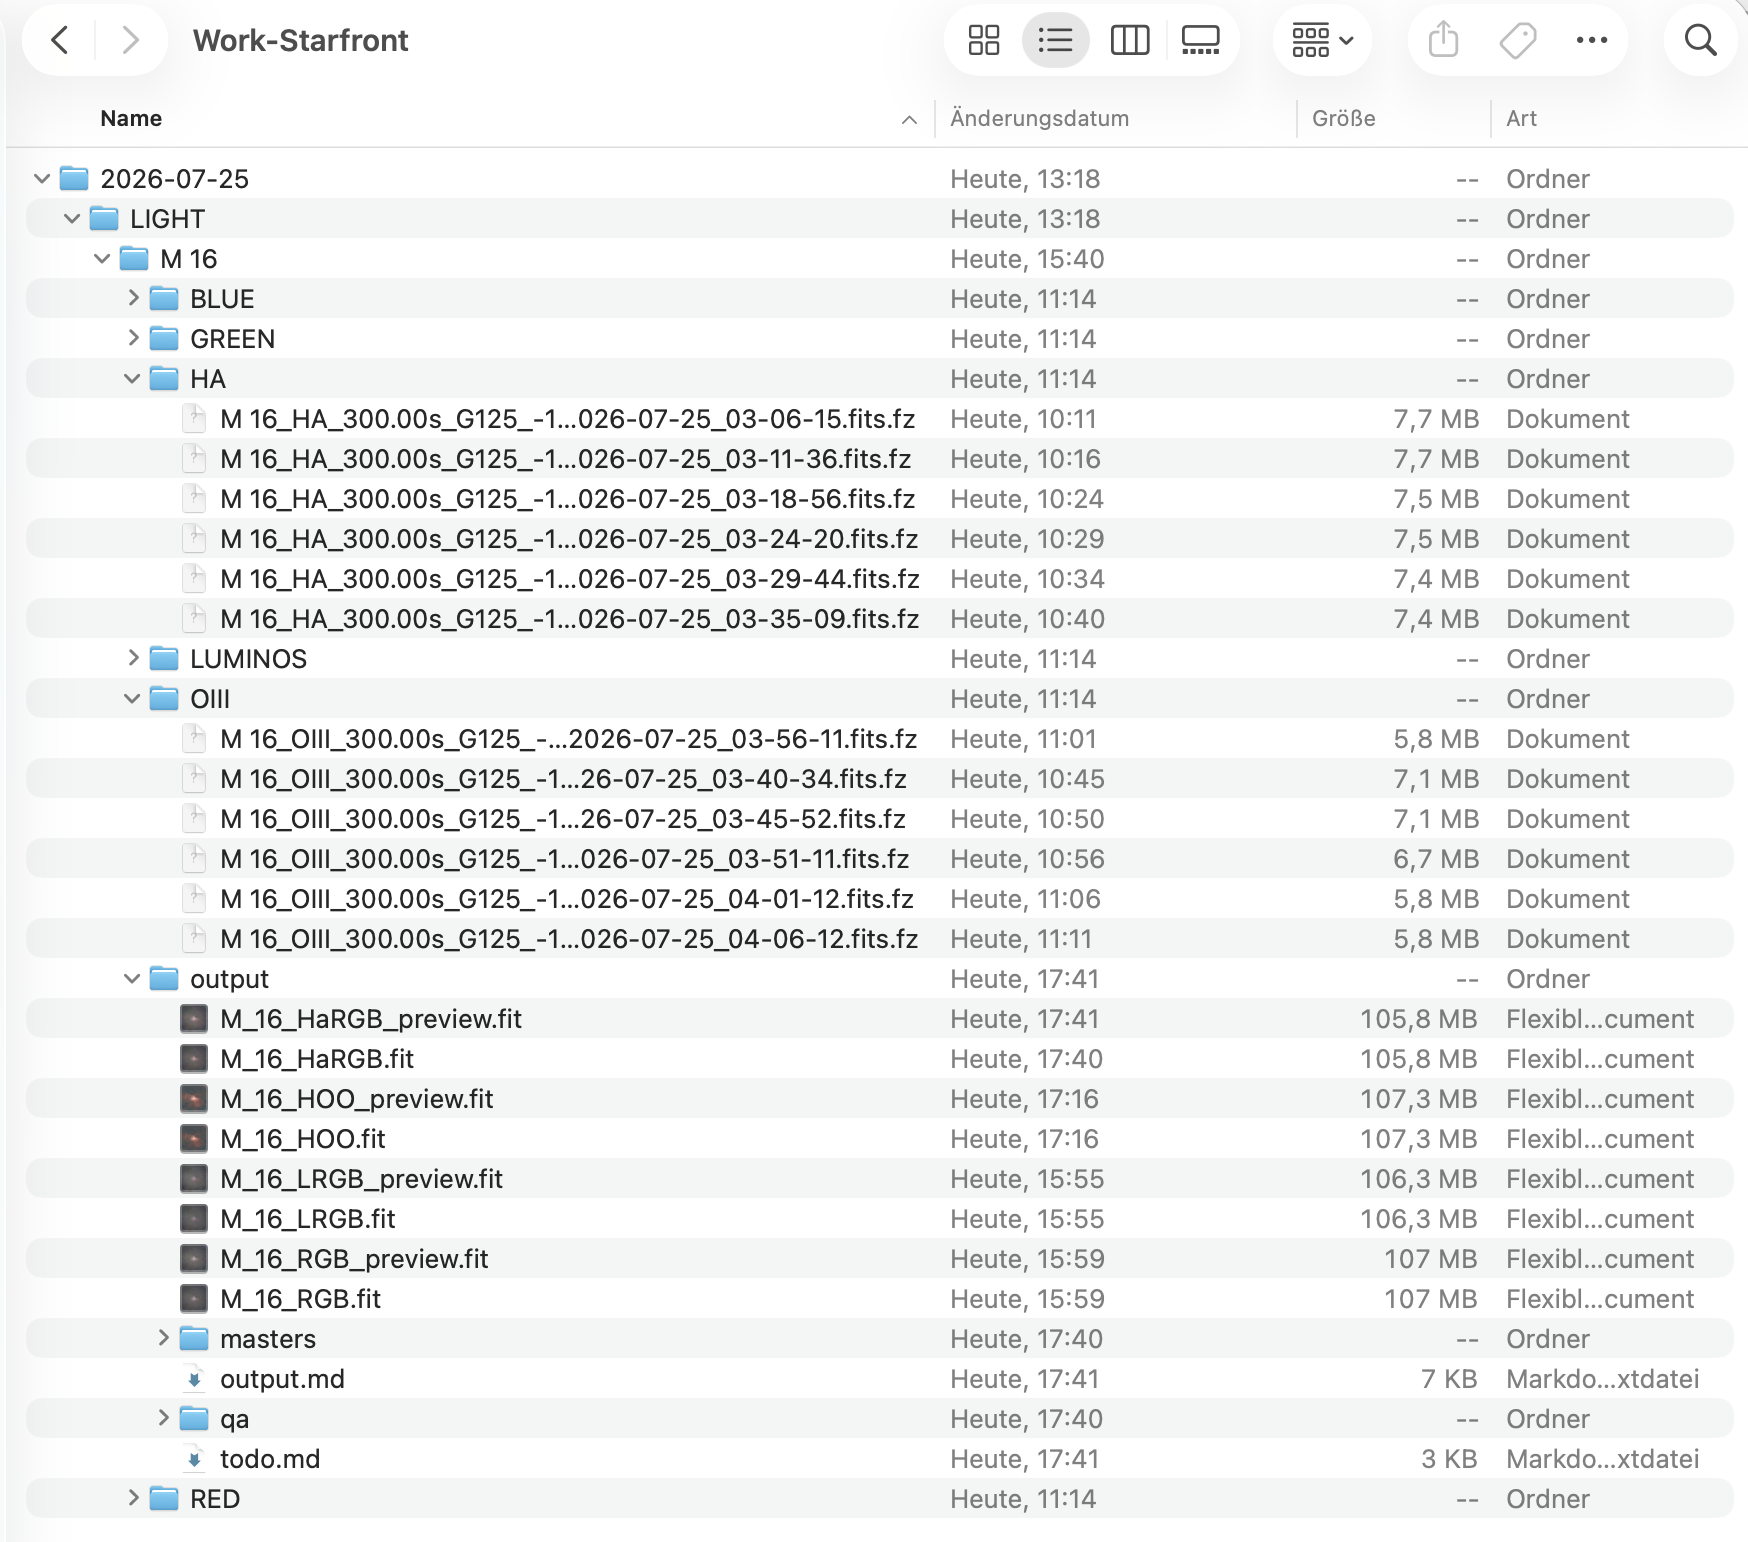
Two files have become particularly important to me. output.md records what actually happened: which channel got which algorithm, which calibration was applied, where something was skipped and why. todo.md lists what I should now do by hand – with the specific menu paths in Siril.
📄 Both files from this exact M 16 run can be viewed here in the original:
These reports are deliberately incorruptible. They don't describe the normal case, they describe the real one. If a filter was skipped, it says so. If the colour calibration fell back to an inferior method, it says so. If a channel lost half its frames, it says so – in the M 16 report, for instance, as a matter-of-fact table row: OIII, 6 found, 3 stacked, 15 minutes integrated. Nothing is glossed over – after all, I want to learn, not to be consoled.
Getting the reports to that point took work, incidentally. A whole batch of changes in the current version addressed nothing but this: a run without a finished composite no longer reads as though it had one. A skipped calibration is no longer called "calibrated". And you're never pointed at a setting that wasn't the cause in the first place. Because a report you can't trust is worse than no report at all – it sends you looking for the fault in the wrong place.
🔎 What actually ran in Siril that night
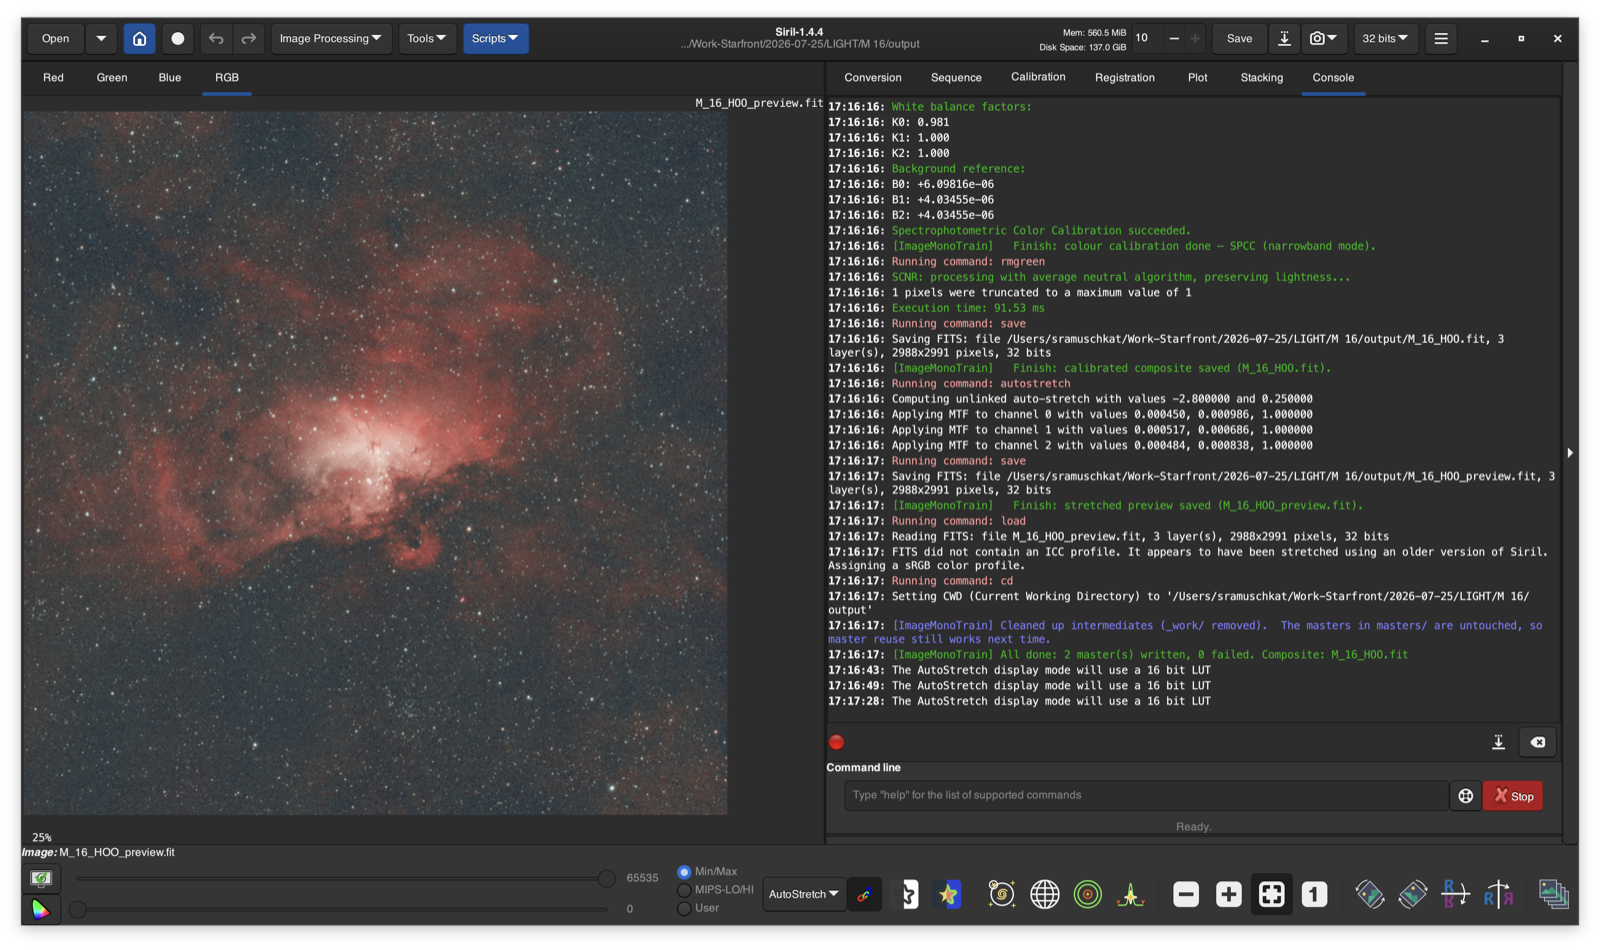
Because "the script takes care of it" says very little, here is the actual chain of commands from this M 16 run – exactly as the log records it. Of the six filters available, the HOO palette needed only two, so BLUE, GREEN, LUMINOS and RED were never stacked at all. The whole run took nine seconds.
Per channel, Ha first, then OIII:
- Linked the six raw frames into a Siril sequence (
link) – nothing is debayered, the path stays monochrome. - Two-pass registration (
registerusing Two-Pass Global Star Alignment, thenseqapplyreg). Siril picks the reference itself – for Ha it settled on frame 5 – and crops to the area every frame genuinely covers. That turned 3008×3008 pixels into 2991×2991. The quality filters stayed off on purpose – with six frames, discarding a sub costs more signal than the worst one costs in sharpness. - Integration with an automatically chosen rejection algorithm: for Ha all six frames with Winsorized sigma 3/3, for OIII only the three usable ones with percentile clipping 0.2/0.1. The reason is in the log too: where Siril found 435 to 812 stars in the usable OIII frames, the other three yielded one single star each – far too few to align them at all. The full command read:
stack r_lights rej winsorized 3 3 -norm=addscale -output_norm -weight=wfwhm -rejmap -32b -out=M_16_HA_fullframe - Removed the background gradient (
subsky, polynomial, degree 1). - Wrote a rejection map to
qa/for inspection.
Then across the channels:
- Linked both masters into a new sequence and registered them together – only now are they pixel-identical. Ha measured 2991×2991, OIII 3002×3006; out came two masters at an identical 2988×2991 pixels in
masters/. - Plate-solved both masters, writing sky coordinates into each – via the locally installed Gaia DR3 catalogue, no internet required. Result: 2.038″ per pixel, field of view 1° 41′.
- Normalized OIII to Ha (
linear_match), so the strong Ha doesn't tip the image green. Here the script promptly contradicted me: this normalisation flattens the line ratio on purpose – precisely the thing the colour calibration wants to measure later. If you really mean to calibrate, it advised, switch the normalisation off. A recommendation against my own setting, which I would never have received while clicking. - Combined the channels with
rgbcomp– R = Ha, G = OIII, B = OIII. The script skipped a fresh plate-solve: the composite had already inherited the coordinates from the masters. - Removed the gradient from the composite as well (
subsky, degree 1). - Colour calibration via the emission lines:
Siril measured 2,617 stars for this and used 1,588 of them. The calibration succeeded – with a telling note attached: the solution was imprecise, and the image gradient should be corrected first. Which leads straight back to the missing flat calibration mentioned above.
spcc "-monosensor=Sony IMX411/455/461/533/571" -narrowband -rwl=656.3 -gwl=500.7 -bwl=500.7 -rbw=4.5 -gbw=4.5 -bbw=4.5 - Removed the green cast (
rmgreen/ SCNR) and saved the result linear. - Additionally produced a stretched preview (
autostretch→M_16_HOO_preview.fit) – for looking at, not for further processing. - Deleted the intermediates in
_work/, leaving the masters inmasters/untouched.
Fourteen steps, one button press, nine seconds – and every single one of them traceable in the report.
Two Days, 7,000 Lines – and a Conversation with an AI
Now the part I don't want to leave out: I didn't write this alone. The script came about with Claude Code, in a long, iterative dialogue – just like the guiding debugging the other day, only this time across two full days.
The basic skeleton stood after ten minutes. That had less to do with the AI than with the fact that I'd already built a whole series of other Siril scripts – the structure, the hook into Siril, the interface scaffolding, all of it was familiar ground. The remaining two days weren't typing, they were thinking and testing: run real data through, see what breaks, understand why, fix it. Over and over.
The result is around 7,300 lines of Python. I wouldn't have managed that alone in two days – probably not in weeks, because in many places I'd first have had to research what Siril even offers. The AI was exactly what it had been during the guiding session: not an oracle, but a very patient conversational partner that explains and suggests. I made the decisions. And I did the testing, too – nobody takes that off your hands.
The Real Payoff
The script now takes all the clicking off my hands – one night of data, one button, and the computer gets on with it while I do something else. But that isn't the part I'm happiest about.
The real payoff is that I now understand mono image processing. I know why a small stack needs a different rejection method. I know where colour fringes come from and why they aren't a colour problem. I know what a colour calibration actually measures. I learned none of that by clicking along – I learned it because I had to explain it to a computer.
That, I think, is the underrated side effect of automating something: you have to get to the bottom of a subject before you can hand it over. Skip the clicking and you've learned nothing. Program away the clicking and you've necessarily understood it.
And next time a night's data arrives from Texas, I'll simply press the button.
🔭 All features at a glance: ImageMono Train detail page · And all my scripts: Svenesis Siril Scripts →